
Well, as promised I'm finally ready to reveal what I've been doing with my craft room. Dum da da dummm....(ok so I showed this first picture to you all the other day, but act excited anyway)!

So just for some perspective, here's my craft room before...

Wow, you know I think that mainly just shows you the difference between the camera I was using before and that new camera. I mean honestly I had a perfectly nice craft room before. It was one of the bedrooms in our house, and it had lots of shelves. The big issue was the work space. I had that one little desk, and it housed a computer. So basically...I had to do all of my painting and craft stuff on our coffee table in the living room.
The new craft room is in our basement. It's a walk-out basement and pretty much the whole thing is finished. Before it was a room that we had always planned to make into a media room, but to be honest it was my old couch that the cats had taken over (yes, cats is plural, but I have two...not 3,4897,324) and we didn't even have the TV hooked up. We really weren't using the room so I, uh...how do I put this nicely? I took it over. The light down here is awesome since it's a walk-out - huge windows with lots of natural light, great for taking pictures!

Here's my new sewing table. Yeah, that's right, a table dedicated just to sewing. I have my serger on one end and my sewing machine on the other. It has leaves that can be folded out so that I have more room on it. Oh, and that cute little chandelier...I originally got it to use in my craft fair booth. It was an ugly orange color and cost 50 cents at a garage sale. I spray painted it and it's good as new!

Behind my sewing table I hung this shelf to hold paints, beads, buttons, and other little things that fit on there. They sell this shelf at Michaels, but wait until it's on sale for half-off (which is every few months). I hung it by myself and it hasn't fallen off the walll yet. I used really big screws...they probably came out on the other side of the wall...but hey, it works.

Here's my awesome new table - it's huge...80" x 60". It's a pinterest inspired project. I used 4 little shelves from WalMart ($15 a piece) and two hollow doors ($25) from Home Depot. The doors come unfinished and you have to paint them. We secured the doors onto the shelves with 4 L brackets (just make sure to put them on the outside edges so that you are drilling into the side piece on the shelf and not just the back of the shelf that's super thin).

As you can see, the table is massive and it really comes in handy. There's also a ton of storage underneath - you can see my chalkboard from the craft fair resting under it.
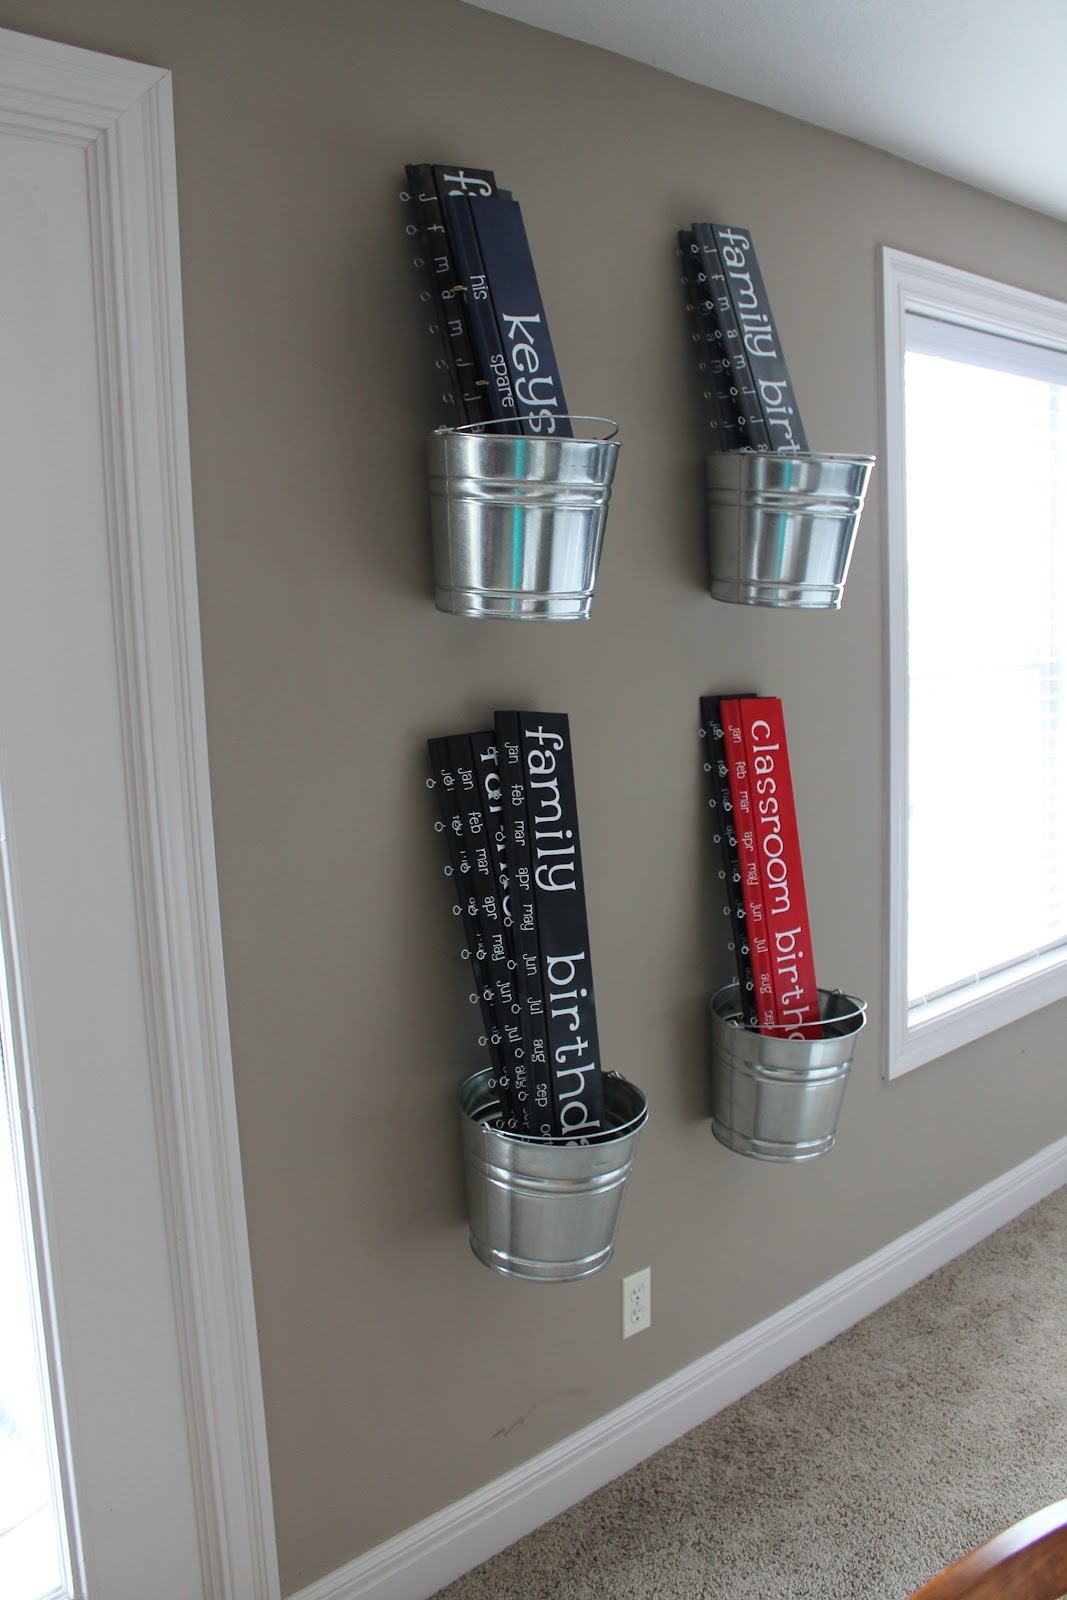
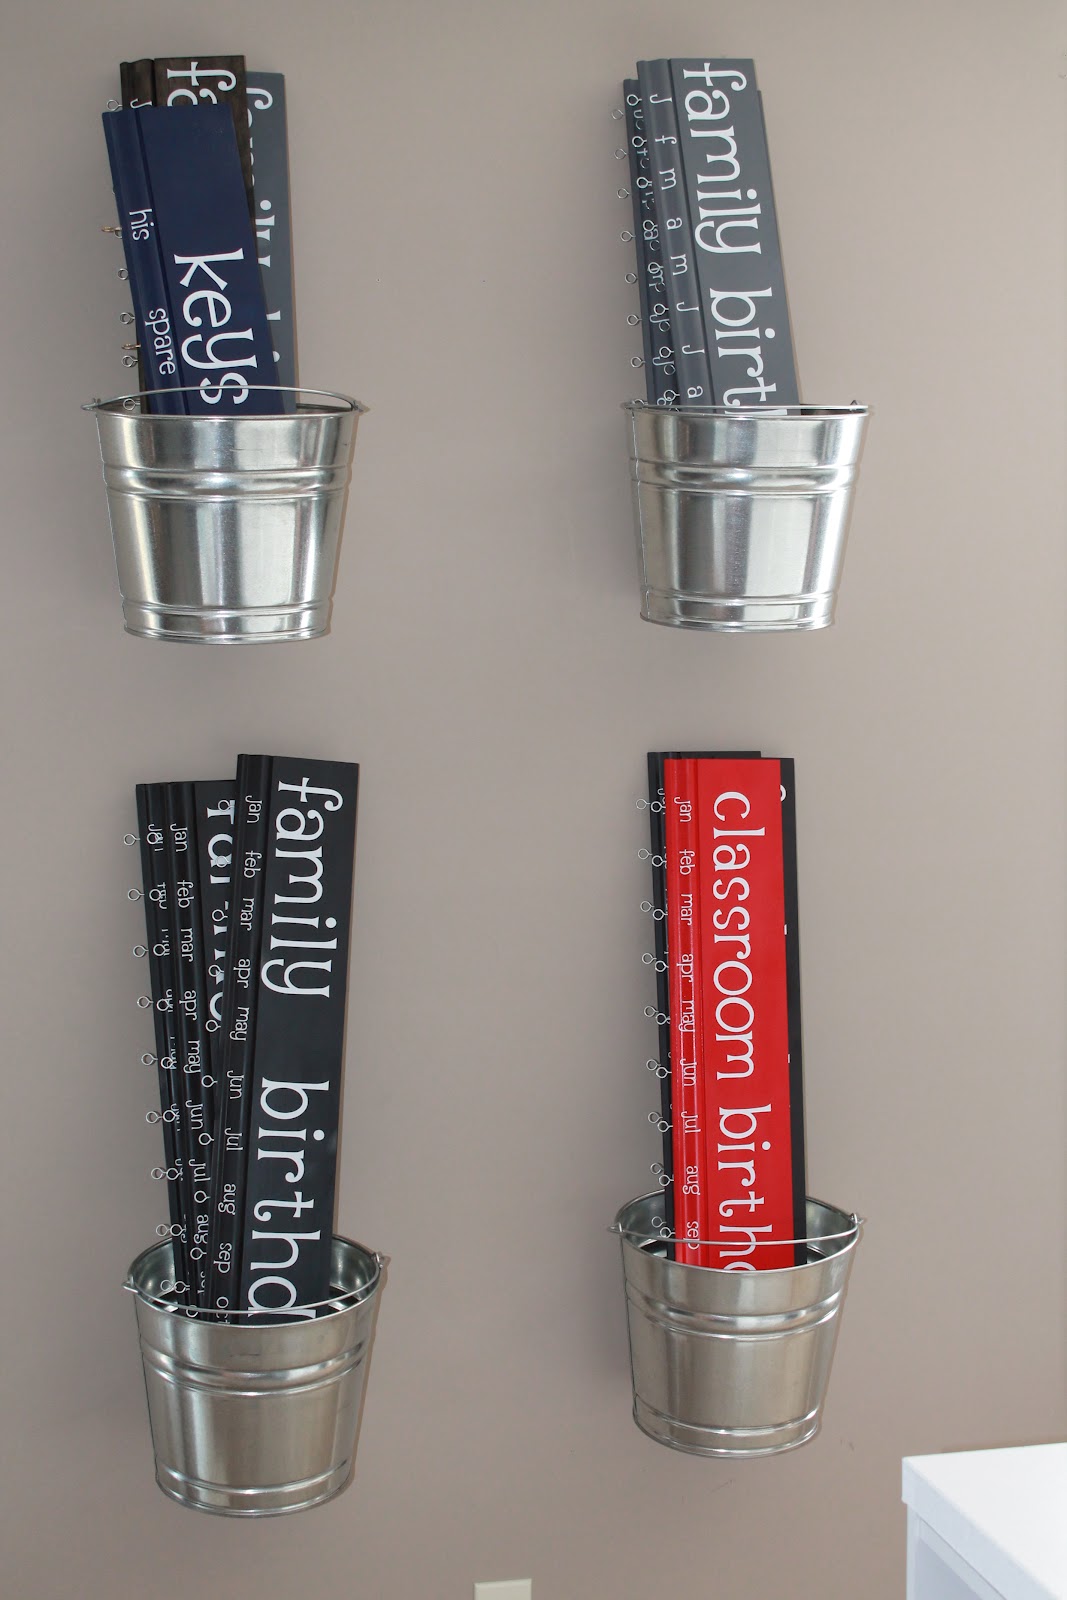
So here was my bucket idea. I found these galvanized buckets at Home Depot for $10 each. So we just drilled a hole in each one and screwed them onto the wall. We used those anchor things to make sure they can hold all sorts of stuff. Right now I'm using them to hold some birthday boards, but I plan to use them long term to hold wrapping paper, etc. as well.
Here's a few more views of the buckets...


Here's an up close view of the storage in those shelves that are making that huge work table. I tried to organize by section - these are the paint and fabric sections. I use the shelving on the back side of the table (the ones you can't see from the door) to hold uglier stuff like binders, clear shoe boxes full of dollhouse furniture, etc.

I have 4 of these little plastic drawer bins. In my old craft room they were stacked up in the closet. Here they are under the huge work table. Two one one side hold sewing supplies and the other two hold knitting and crochet supplies. Have I mentioned how much I love my label-maker? Because I do, I really do...

Here's a view of the back wall. This is basically all of the furniture I could fit in my old craft room. I have my desk with computer for blogging and watching My So Called Life on DVD while I craft. Then I have some art (my granny needlepointed that little boy reading the book that hangs above my desk...I love it) and my two shelves that flank my desk. I again have these shelves somewhat organized in categories - the Cricut is near a large basket full of vinyl, the adhesives are all together, etc.

Here are discs for the birthday boards. When I order the wood discs, they are literally unfinished wood discs with no holes. So it's a process to drill the holes, paint both sides of the discs, and then put the connector rings in all of them. If I have some always done in advance, I can fill orders a bunch quicker! I'm just using mason jars to hold them...arranged by color. Oh and hanging above them is a tension rod holding all my ribbon. I have another tension rod in the smaller white shelves holding a roll of freezer paper for sewing projects. I love me some tension rods - super cheap ($2 at WalMart) and offer some more creative storage.

And here's my drain pipe yarn storage. I'm really loving it and think I'll use this technique for additional storage in the future.
I still have a bunch more I plan to do down here - including some curtains (I'm thinking of using canvas shoe organizers on either side of the window because they'll sort of look like curtains but they'll hold more stuff), scrap paper storage using old cereal boxes (we're currently collecting them at our house) oh and I still need to get my card catalog and this massive dollhouse moved down here...

I have a special table we made for it so that will probably be moved down shortly...
Alright, well thanks for stopping by and taking a look around my craft room. Hope you enjoyed!


Yowza!! Your organization makes me drool. I wish I could borrow your anal retention for a day or two so I could get some of my stuff organized like this! I love all of the really awesome storage ideas. I am going to have to steal some of them. Looks amazing, lady! You guys did a fabulous job.
ReplyDelete"borrow her anal retention"? hmmmmmmmmmmmmm and yikes............interesting choice of words. LOL...having said that, I totally understand what you said.....LOL again.
ReplyDeleteLoved all your ideas.....especially the huge table with under storage cubbies shopping walmart!!
ReplyDeleteDid you put a sealant on the doors
ReplyDeleteOMG ABSOLUTELY gorgeous!!!!! I love it!!!!! Your table (and room) is exactly what I want BUT...you have to have a super large extra room for this and I don't :(
ReplyDelete